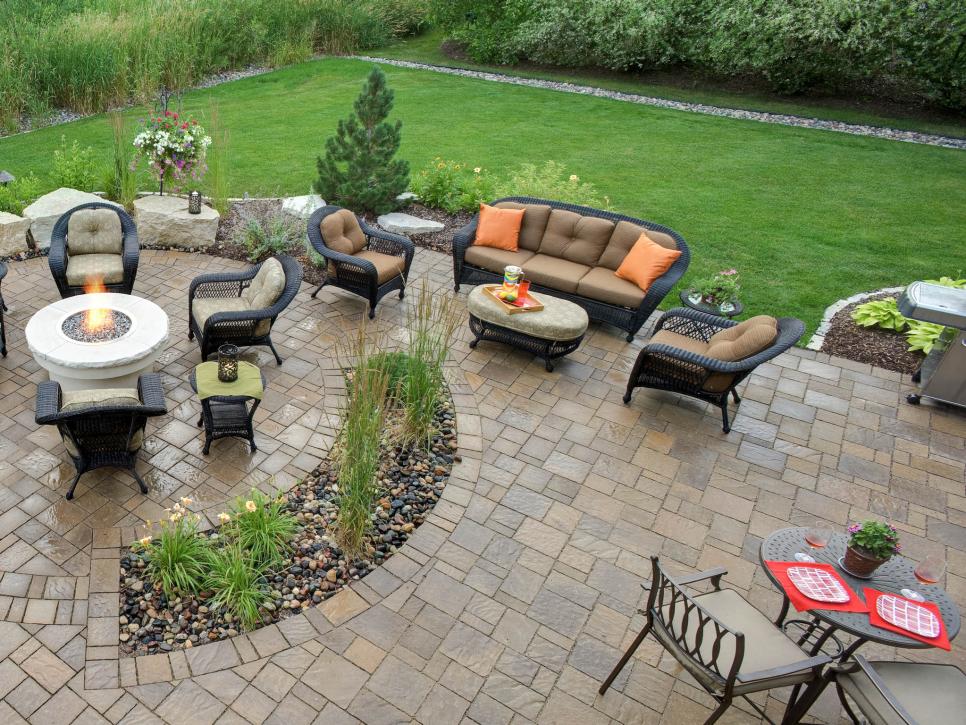
How to Design and Build a Paver Patio
alicebarianna May 28, 2021Outdoor sitting areas and walking paths are becoming increasingly popular and important parts of many homes. The best ways to design and construct paver patios in your backyard are being discovered by interior designers and builders for house renovations in Dubai. There are various options to pick from, as well as many installation techniques. Let’s take a look at the fundamentals of designing and constructing a paver patio for your home.
Steps to Design and Build a Paver Patio
You can design and build a paver patio yourself or with the help of a professional by these simple steps.
Analyse and Prepare the Area
The most important part of creating a pavement is the selection of land where you are going to build it. Keep these few in mind while choosing the area:

- Make sure that the area is flat and levelled.
- Check for any underground utilities.
- Measure the area to order or buy the right amount of material needed for the pavement.
- Before you do a permanent fix, place the paver blocks to see how they fit.
- Now, measure the area and pound four stakes into each corner.
Set the Base
The next step for a gorgeous Home renovation Dubai paver patio is to lay the base. It depends on your choice and priority on how you want the pavement to look in the end. You will need two materials to fill the base, compactable gravel and sand.
For the base, you need to do some digging. It is up to you how much deep you want to go. As people usually like the paver to be at level with the rest of the area, the best measurement is to dig as deep as your paver block’s width with an additional half of it for a sturdy base.
To set the base, you need to fill the area with compactable gravel first and level the surface with a steel rake. Fill up to one inch less than the extra you dug. For example, if your pavers are 10″ thick, you dig 10″ (for the block) + 5″ for the base. Fill the gravel 4″. Once filled, you must not rely on your estimation, but check the area with a spirit level or wooden 2×4 to make sure it is even on all sides.
Make sure to tamp down the gravel as you keep filling it. Now seal and compact the base material with the help of a plate compactor. Use it all over the area at least twice for best results.
Once done, it is now time to add the final layer of the base material. Before that, install galvanized steel edging to mark the edges beyond the pavers that have to be filled. You can find the edging in aluminum and plastic too.
Fill in the sand to a thickness of 1″ and ensure the base is leveled as you place the paver on it.
Extra tip: Create a slight slope across the area to encourage water runoff.
Lay the Pavers
Once your foundation is firm and level, the next step is to install the pavers. To secure the paver bricks, place them one at a time and lightly press them down with a rubber mallet. It is also useful for creating a small drainage slope. Lift any blocks that are lower than the others, then fill in any gaps with sand before laying the paver.
Fill the Joints
When you have installed your pavers properly, you now need to do the finishing touches. The pavement might be practical already, but not as gorgeous. To add a finish to your paver patio:
- Fill the joints correctly, so the pavement looks neat.
- Use a broom to push the excess sand into the joints, cleaning the paver meanwhile.
- Add more sand if needed.
How to Enhance the Look of Your Paver Patio?
Interior design experts at Exotic Interior Studio believe that the paver patio is among the most crucial elements of your home as they offer the first look. Make your patio look absolutely stunning with the addition of some gorgeous lights. Placing some plat pots on either side also adds an eye-catching element to your paver patio.
For more home renovation Dubai inspiration, connect to your experts and get consultancy about any interior-related questions.


